Monday, December 21, 2020

SDR Showdown $25 VS $120

Hello radio enthusiasts. Many of you know of or have heard of Software Defined Radios (SDRs) especially if you read my blog. Well, I recently purchased another SDR to add to my gear. I wanted to try out one of the higher end SDRs on the market and see how they stack up against the RTL-SDR Blog V3

I looked at reviews, videos, demos, and feature comparisons of SDRs in the $100-160 range and narrowed it down to two devices. The SDRplay RSP1A and AirSpy HF+ were top contenders in this price range based on features and performance. Black Friday sales significantly brought the price range of these devices very close together. There seems to be a lot more reviews for SDRplay products so I ended up buying the RSP1A.

Here is my comparison between the RSP1A and RTL-SDR Blog V3.


Prep and Equipment

I used a 25 foot, indoor, longwire antenna with 3 feet of RG314 coax terminated to a SMA female connector. This antenna was connected to a SMA Tee so I could run the RSP1A and V3 simultaneously on the same Windows PC. Frequencies used were in the HF band in the early evening and late afternoon. SFI was about 85 during the tests.

Contender 1: SDRplay RSP1A ($120 USD) The RSP1A boasts a 14 bit ADC with up to 10MHz bandwidth, simultaneous connections, and selectable notch filters (AM/FM/DAB) using SDRuno software. It's frequency coverage is 1KHz to 2GHz. Installation of the drivers and SDRuno software were really easy. I had the RSP1A up and running in about 15 minutes. Datasheet link here.

Contender 2: RTL-SDR Blog V3 ($25) The RTL-SDR Blog V3 uses a 8 bit ADC with up to 2.4MHz bandwidth. There are no onboard filters for AM/FM/DAB. Frequency coverage is 500 KHz to 1.766 GHz. Driver installation and software installation were not quite as smooth as SDRplay, but it wasn't too bad with the excellent tutorials online. Datasheet link here.

The RSP1A was used with SDRuno and the V3 was used with HDSDR. Using the RTL-SDR Blog V3 with SDRuno is clunky at best with the EXT-IO driver installation.

Both units were configured with medium AGC and full use of the internal RF amplification available in the software settings. Both devices were calibrated to WWV and matched for DB/Signal levels with a other hardware on the same antenna connection (Tecsun PL-880 and Icom-751a).


Construction


Comparison

The RSP1A displayed  8 MHz bandwidth. It was refreshing to see more range above and below the LO. You may ask why only 8 MHz displayed instead of 10 MHz? It can display up to 10 MHz in some cases, but I am not sure why I was only seeing an 8 MHz spread. I did not see or hear many signals coming through the noise floor. I did not hear any DX stations while tuning the SDR.

The V3 displayed 2.4Mhz bandwidth and I saw more stations coming through the noise floor on this SDR. I was able to tune and listen to a few stations easily.

I was a bit puzzled by the RSP1A and reduced the bandwidth down to 3 Mhz bandwidth for better comparison. I was able to see and listen to some of the same stations as the RTL-SDR Blog V3 now. I could hear DX stations on both devices, but the audio was more intelligible on the V3. This is where things became more comparable between the devices and performance was similar.

The RSP1A had better sensitivity at 3 MHz than 8 MHz bandwidth. The RSP1A had problems pulling out intelligible signals in or near the noise floor. I was hoping for a more sensitive SDR with a wider frequency display using the RSP1A, but that was not the case.

Another observation was the audible noise between the two devices. It seemed the RSP1A had more noise on the signal than the V3. I found some information on SDRplay's forum from others who experienced the same issue. I did not find a good technical response or resolution to the issue.

Another notable feature between the RSP1A and the V3 is the onboard filtering. The RSP1A shines in this area because SDRuno automatically selects the appropriate filters to reduce overloading and interference while tuning. The filters work extremely well as I did not have AM/FM bleed-over on HF. External filters and add-on boards are available for the RTL-SDR BlogV3 to rival the RSP1A's built in features. AM bleed-over to HF bands is a problem with the V3 due to lack of selectable filters.

The RSP1A is housed in a plastic box with some "metallic" spray covering the inside. This is an attempt to reduce EMI and RFI. It did not perform well when I moved a laptop power brick near it as I saw numerous spurious signals on the bandscope.

The RSP1A requires a separate purchase of a shielded USB A/B cable. Those will cost between $7 and $10. Why it's not include with the product baffles me. If you want further EMI and RFI shielding, then you can purchase a metal case for $25 from third party sellers.

The RTL-SDR Blog V3 is housed in a metal case grounded to SMA jack. It also has USB filtering to reject interference. My laptop power brick had little effect on the SDR displaying only a couple spikes on the bandscope. There is no need to purchase a separate USB cable for typical installations.

The RSP1A appears to lack heat dissipation as there are no heatsinks on the processor or other components. I don't know if it is needed and did not notice any substantial drift or performance issues during the test.

The RTL-SDR Blog V3 uses the metal case as a heatsink to keep the processor stable with some non-conductive thermal tape for heat transfer. The metal housing does get warm, but I did not notice substantial drift after hours of use.


Conclusion

The RSP1A and RTL-SDR Blog V3 seem similar from a performance standpoint. Is the RSP1A worth the 4x price tag of a V3? That is an absolute NO from me!. There are several reviews for this RSP1A from other HAMs and SWLers praising this SDR for HF listening. I don't see what all the praise is about. I do understand the out-of-box experience is a little better with the RSP1A, but that doesn't seem to be enough reason to buy it. The V3 is rather simple to setup with ZADIG and the appropriate driver. Using Direct sampling of the V3 produced rather impressive results too.

The SDRuno software interface is not as user-friendly as it could be. It offers an extensive array of settings for the tinkering mind to spend hours tweaking and fiddling which is great. I found the workspaces thing to be a pain in the butt. I did not like the taskbar littered with several open windows. New versions are coming out frequently to address the numerous bugs in the software so I am happy to see an active development community for their product.

HDSDR is a very simple out-of-box installation as well. It just works with only minor tinkering. It is more user friendly than SDRuno for a new or casual user.

I tested both devices using SDRuno and HDSDR software. The performance of both SDRs was about the same. Keep in mind that using the RSP1A or RTL-SDR Blog V3 outside their native software offerings will require an EXT-IO driver that may reduce functionality.

I regret buying the RSP1A and should have tried another offering like the Airspy HF+. Maybe another review in the future?


73,

JJ W9JES

Thursday, December 10, 2020

A Litte Update

Hello folks!

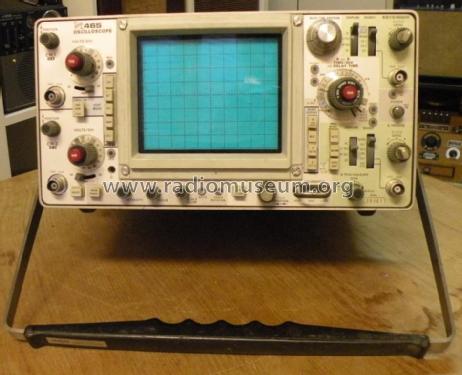
I wanted to share a little update with you. I am still working on projects and have a few radios in for repair. Most of it came to a halt as my beloved Tektronix 465 scope is on the fritz. I had to change focus to repairing the scope (5V power rail had a short) and waiting for parts. I also picked up another NanoVNA to have some fun with. This VNA will be used with custom firmware and see if we can make some interesting projects out of it. Also got to experiment with a SDRplay RSP1A. You will see a review soon.


I have a couple shortwave receivers here to repair and an Icom transceiver. I will try to share some updates as time permits over the holidays.

Speaking of the holidays; our radio club held the annual Christmas party tonight. It was a bit different than previous years due to Rona and was hosted over a virtual video conference. It was fun nonetheless.

Happy Holidays and I will see you soon. Let's hope for more 100+ SFI days to enjoy DX'ing!


73,

JJ W9JES

Saturday, November 28, 2020

Ham Radio Movies

 Who remembers this movie? This is WM1ATE calling HB9RFX. 

High Frequency (1998)

Of course, many of you also remember the movie, Frequency (2000) and a subsequent TV series.

What other shortwave or ham radio movies do you remember?


Here is a list compiled by Dave, AD7DB.

"Gone With the Wind" - 1939. Drama. The classic story of Brett and Charlotte as they try to save their 100 foot tower in the worst windstorm to hit Georgia since the Civil War.

"The Longest Yard" - 1974. Comedy. Burt Reynolds acquires the largest property in a new subdivision, then finds his plans to put up a huge antenna farm thwarted by a hostile homeowners association (Jackie Gleason, Loni Anderson, Dom DeLouise).

"The Lost Contest Weekend" - 1945. Drama. Ray Milland in a dramatic battle on 20 Meters for one elusive QSL.

"I Was a Teenage Novice" - 1957. Drama. A troubled teenager (Michael Landon) finds fun and excitement after getting a ham license.

"It Came from Radio Shack" - 1977. Horror. Bill Bixby tries to keep a computer called TRS-80 from taking over the world.

"Rear Window" - 1954. Suspense. Alfred Hitchcock did several marvelous films heavy on the subject of ham radio. In this movie, James Stewart plays a man confined to a wheelchair, determined to break the CC&R's and put up an end-fed wire antenna going out his apartment window - without the neighbors catching on. Grace Kelly and Thelma Ritter also star. Watch for Hitchcock's appearance over in Ross Bagdasarian's apartment.

"The Man Who Knew Too Much" - 1956. Suspense. James Stewart shows up at an FCC testing office for his ham license. What he doesn't know is, he's over-studied for it, and is smarter than the examiners, who force him into working for them! Watch for Hitchcock's appearance as someone taking a code test! See if you can figure out what he's sending!

"The Birds" - 1963. Thriller. The classic about a bunch of people stranded in a Northern California town who find that the only means of communication to the outside is by way of some of them newfangled OSCAR satellites.

Other Nominees:

"Frequency" - 2000. Drama. Ham operator finds his radio can time warp and talk to his dad decades in the past. How does he expect to QSL?

"Contact" - 1997. Drama. Female ham operator (Jodie Foster) controls the Arecibo radiotelescope, where she picks up an extraterrestrial signal. Now that's what I call DX


Friday, November 27, 2020

Tecsun PL880 Repair


I picked up a broken Tecsun PL-880 from a customer who no longer wanted the radio. Here is the story and result.


Back Story

The radio was owned by a ham radio operator who used it as a bedside companion. He said that it fell off the nightstand one day and crashed on the floor while a Tecsun AN-48X antenna was connected at the time of the crash. It damaged the connector and possibly some other components. He attempted to repair the antenna jack using a home brew method and said the radio never worked right afterwards. He reported that AM and Shortwave band reception was flaky and the tuning encoder wasn't working well either.

Here are some screen caps of a video he made about the repair.


Diagnosis/Repair

The radio arrived a week later and I put a fresh 18650 in. Powered up and tuned FM stations just fine. Switched to AM and shortwave - it was completely deaf. Normally the strongest AM station in town is able to come through on a crystal radio set, but not the Tecsun. The tuning knob was erratic and seemed to jump two steps or not do anything at all while tuning. Touching the tuning knob increased static to the radio.

A few ideas crossed my mind at this point. 

  • The radio suffered cracked solder joints.
  • Misalignment occurred from the crash.
  • Something was shorted to ground.
  • The front end transistors were blown or the repair failed.


My first look inside the radio. Notice the compressed brown wire next to the screw hole. There was a nick in the insulation from the screw. (The back of the radio case has a metal shield and pad to ground the radio to the PCB shield.) Also noticed several missing screws.


 I removed the home brew connection and the broken  antenna connector, then installed a temporary jumper across the external antenna switch pads. Also cleaned up the solder flux and excess solder. I wanted to see if this was a simple fix.


I powered up the radio and it was still deaf on AM and shortwave bands, but the tuning encoder works great now (suspect ground short from previous owner's repair).

Time to figure out the radio circuitry and trace/test components. I used my DMM, signal generator, and scope to make my way through the receiver. Immediately, I found a cracked diode in the protection circuit next to the antenna jack, I replaced it with a 1N4148.


No other broken traces or failed transistors in the front end until I made my way to the mixer circuit and the signal died. I found a broken inductor on the board at L9. L9 is a .47uH fixed inductor that couples L6 to the mixer input for AM/SW. I cannibalized another receiver and replaced the component. Now the signal tracer was making it to Q7 and Q8!

I powered up the radio and tuned WWVH on shortwave. The radio came alive! Tested AM and it was very weak. Time to go back to the AM input circuit. Q26 tested fine, but the ferrite antenna leads needed to be reflowed as well as a broken wire repair at AM1.


Tested the radio and AM came back to life! Now on to the external antenna jack. I ordered replacement jacks and soldered one in.


Now the radio is as good as new! External and internal antennas work. I did not need to perform an alignment on the radio as it checks out fine. (The RF shields need to be desoldered to perform a full alignment).


73,

W9JES


Thursday, September 17, 2020

Radio Shack/Sangean Replacement Speakers Available

 Hello folks. Those of you who want to revive your radio's sound can purchase a replacement speaker for $36. Shipping in the US is free.


 Speakers available for:

  • ATS-909
  • DX-398
  • ATS-606
  • DX-399
  • ATS-505
  • DX-402
  • 20-629

The speaker requires replacement if the volume of your receiver is low and the audio distorted with a crackling or buzzing sound. Radio Shack no longer carries this specific replacement anymore, but I have a limited quantity of replacement speakers from a different source.


These speakers are manufactured by a different company with the same dimensions and audio characteristics of the original speaker. They are a direct replacement and fit inside the radio without modification or damage.

Here is what a bad speaker sounds like.


 If you don't feel comfortable opening your radio and using soldering tools, then let me do it for you for $45 plus shipping.

Feel free to contact me for details by using the form on my website.


Thursday, May 21, 2020

Radio Shack DX-398 / Sangean ATS-909 Mods Part 4 - IF Out Panadapter

This modification is similar to the DX390 panadapter tutorial that I posted HERE. I encourage you to check it out for more detailed information on panadapters, software, SDR dongles, and configuration.


What You Need

  • SDR


The Radio


The DX-398/ATS-909 is a dual conversion, superhetrodyne receiver.. The first IF is 55.845 MHz and the second IF is 450 kHz. We want to use the 1st IF stage for our panadapter for maximum bandwidth.


Connecting your SDR directly to the radio could alter the signal of the IF stages and cause poor reception. It could also transfer unwanted DC voltage between the radio and your SDR. We will use a small value capacitor for blocking spurious voltage and resistor to prevent receiver sensitivity drain. Connect them in series to your radio.


Identifying the correct tap point for a strong IF signal in this radio is fairly simple. We could tap between Q3 and Q4 near the filters. The Sangean service manual indicates TP11 is used to measure the 1st IF frequency. We can use this for our panadapter.


Connecting the Cable to the Radio

Disassemble the receiver case and remove the large circuit board. It is much easier to remove the speaker and control pcb before drilling holes and soldering. 

Drill your holes in the plastic case near the external antenna jack. Watch out for the two inductors. You can gently separate the rear pcb from the plastic housing to prevent damage to the components.

Make your cable assembly and add heat shrink.


Secure the cable assembly with the connector nut.


 Route the wire through the top hole and solder to TP11.


 Reassemble the radio and test.


73,

W9JES

Monday, May 4, 2020

Radio Shack DX-398 / Sangean ATS-909 Mods Part 3 - Tuning Knob

The next part of this series covers the rotary tuning knob. The DX-398 has a good tuning knob, but it has an unwanted feature causing it to stop or "click" in small increments. It is hard to spin the dial freely while tuning for DX. This is due to the plastic notches or detents in the tning shaft that mate up with a half-circle in the metal retainer/spring assembly.

Arthur Hollingsworth  created a video on how to perform this mod - You can view it here https://youtu.be/53VKmO8mqTc?t=1172


Steps

  • Locate 6 solder pads on the circuit board near the LCD display light
  • Remove the solder from the 6 pad connections
  • Remove the tuning control from the board


  • Gently pry up the 4 metal tabs on the back of the tuning control with a small, flat bade screwdriver. Use a pair of needle nose pliers to remove any bends
    Copyright Arthur Hollingsworth
  • Gently separate the metal case and plastic control housing.


  • Remove the copper section from the 4 plastic retaining posts

  • Using needle nose pliers, gently flatten the notch that sticks up on one side of the ring.

  •  
  • Reassemble the tuning knob in reverse order noting correct orientation (note the "detent" is now removed, but is shown here for reassembly reasons)
  • After the control has been put back together gently flatten the 4 tabs back into place using the needle nose pliers
  • Resolder the control into place on the PCB
  • Check your work and power up the radio
  • You should now be able to tune much easier now


73,
Jesse W9JES

Radio Shack DX-398 / Sangean ATS-909 Mods Part 2 - LED Replacement

This is one of the easiest mods you can do to a 909. Replace those dim, lime green LEDs with white ones!

All you need to do is desolder the old ones and replace them. Be sure to note polarity as seen on the PCB.


73,
Jesse W9JES

Radio Shack DX-398 / Sangean ATS-909 Mods Part 1 - Disable Mute


This radio design was sold under several brands including Radio Shack and Sangean. Radio Shack's model DX-398 and Sangean ATS-909.


Disable muting while tuning aka "chuffing"


This radio has a similar design to the ATS-818 where the PLL muting circuit is processed by the controller chip.


Steps


  • Disassemble the radio
  • Locate  CNT2
  • Find the Black Wire connected to PIN 10 and gently pry out with a small screwdriver
  • Use some heat shrink tubing and cover up the exposed pin and tuck neatly behind radio
  • Reassemble radio and enjoy!

Sunday, March 29, 2020

What do I look for in a shortwave radio?

A common question that I've been asked on my blog. What are some features that you find very important in a shortwave radio?


My listening preferences include talk radio, news, music, digital transmissions, and ham radio voice/data. Each person has different tastes when it comes to shortwave radios and I will try to generalize my list of must haves. but know there is some bias in my opinion. I am also interested in hearing about your opinions in the comments!

Must Have Features:
  • Physical Attributes
    • Sturdy, tactile feedback on the controls
    • Feels durable, not flexible
    • Ergonomics designed for frequent operation
    • Direct entry keypad
    • Rotary tuning knob
    • Tuning in 1KHz steps
    • RF attenuator (local/DX)
  • Frequency Coverage
    • Can listen to all commercial broadcast bands and amateur radio bands up to 29 MHz
  • Audio
    • Clear and intelligible sound from internal speaker for talk and music
  • RF Selectivity
    • Ability to reduce interference from nearby stations +/- 3KHz
  • RF Sensitivity
    • Ability to pull in signals at 2% over the noise floor (this is subjective as some radios measure sensitivity in dBµ/m or µV/m)
    • Adequate built-in antenna(s) to receive weak signals
  •  Double conversion receiver stages
  • Single Sideband (BFO or true LSB/USB)
  • Station Memory Recall
    • Ability to store at least 10 frequencies for quick access

 Nice To Have Features:
  • Large, bright, clear, and readable digital display
  • Selective backlight on/off toggle
  • Dimmable backlight
  • RF Gain Control
  • Triple Conversion receiver stages
  • Reputable internal components including filters
  • Dual power sources (house power and battery)
  • Recharging circuit to charge user supplied batteries
  • Line out jack
  • External antenna input
  • Audio filters (bandwidth, notch,tone)
  • RF Sensitivity to pull in signals below noise floor
  • Built in DSP signal decoders (DRM, CW, RTTY)

Friday, March 6, 2020

Radio Update

I've been very fortunate to pick up a "blue label" Sangean ATS-505 and Radio Shack DX-398 / Sangean ATS-909 this week. Both radios are expected to be delivered next week.


The current "red label" ATS-505 that I own has a bad encoder. I bought a replacement online, but it needs to be modified to work with the radio. The DX-398 has a deteriorated magnet in the speaker (common problem). My initial plan is to use the speaker from the ATS-505 "red label" for the DX-398.

I don't know if I will eventually repair the "red label" ATS-505 or just use it for parts in the DX-398 since many of the components are the same.

The good news is that I will be able to provide more content to you including modifications, enhancements, and repair information! Stay tuned!


73,
Jesse W9JES

Friday, February 28, 2020

Mods for the Radio Shack DX-402/Sangean ATS-505 Part 1 Disable Mute

Intro


 Great news to all my followers as I picked up a Sangean ATS-505 shortwave radio this week. I did not hesitate to perform a quick function test, listen to a few stations, and familiarize myself with the radio. My first impression - Not bad! I couldn't wait to get the screwdriver out and a schematic on the screen!

This radio design was sold under several brands including Radio Shack. Radio Shack's model DX-402 and a later version under catalog number 200629 (20-629). This design was also used in the Roberts R9914 and Sangean ATS-505P. It appears that the Radio Shack 200629 and Sangean "Blue Label" ATS-505's incorporate a different AF chip for better sound. The processor was also reprogrammed to eliminate chuffing as well.

It is a fairly decent radio overall with exceptionally great AM/FM sensitivity for DX'ers. I don't test LW in the United States, but shortwave reception is on par with my Grundig G5.

There seems to be challenge to find the best portable radio when it comes to features, reception, audio, and size, however this receiver performs well for it's size and provides some nice features.

Disable muting while tuning aka "chuffing"


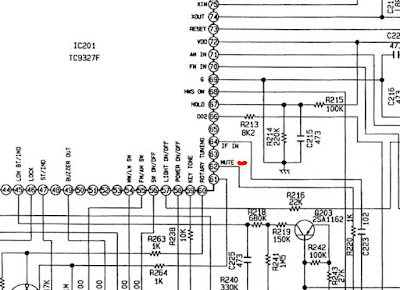
This radio has a similar design to the ATS-818 and ATS-909 where the PLL muting circuit is processed by the controller chip. In this case, it is a Toshiba TC9327F 4-Bit Microcontroller.

Pin 52 of the microcontroller is the Mute I/O port that connects to Pin 5 of CON2. Removing this single wire connection allows the radio audio (AF) to be heard while tuning or scanning.


Steps

  •  Detailed disassembly instructions here https://earmark.net/gesr/2000629.htm
  • Remove all batteries from the radio
  • Rotate the whip antenna up a few inches.
  • Locate and remove 5 screws ( under whip antenna has a short screw, middle and bottom screws are longer, and one near the antenna base) Do not remove the screw which does not have an arrow pointed to it. This is used to secure the antenna
  • Remove the rotary tuning knob by gently pulling straight off (don't lose the plastic washer under this knob because it is used to prevent dust and direct moisture from entering the radio
  • Use a plastic pry tool or small flat blade screwdriver to gently pry apart the radio at the seam. There are several plastic tabs securing the radio. Go slow! There are two tabs on the bottom, one tab on the ext antenna jack side, and one tab on the top of the radio.
  • Remove the front of the radio and fold it over as not to interfere with the speaker wires.
  • The display (controller board) is held in place with two screws. Remove them.
  • Locate the 3 tabs on the bottom and two tabs on the top of the board. Gently pry back the tabs while lifting the circuit board up (Push the lock slider out of the switch while moving the board up
  • There are two connectors attached to the controller board. Lift up the bottom of the board to gain access to Connector 2 (CON2)
  • Notice the red wire and 14 white wires. The red wire should be at pin 1 (left side of the radio as you are looking at it)
  • Count the wires from left to right and stop at #5. This is the wire you need to cut or remove from the socket
  • Cut the wire and secure the ends with tape or heat shrink tubing
  • Reassemble the radio in reverse and enjoy!

73!
Jesse W9JES